Friday, March 31, 2006

My brother's car


220D
Originally uploaded by orthotomeo.
We were originally going to convert this guy to run on WVO, but didn't for whatever reason. It'd be a good car to do it with as it's all manual and warms up quick. This is my brother's 1969 220D. It's in better shape than mine.

I'm still waiting for my switch and still need to get a good supply of WVO for my car! My current one is only giving me 20 Liters a week and I need MORE! I just need to make time to go out to a buffet to arrange the deal.

Thursday, March 30, 2006

Eww, gross!


One of these things...
Originally uploaded by orthotomeo.
Well I figured I'd update the results. On Tuesday I took the filtered oil and repeated the process with a jar and water. I wanted to see how much filtering improved the speed of water washing.

There we have it. After only half the time, the rightmost jar (filtered first) separated water the fastest. The bottom layer is water on the right and it only has a small amount of garbage in it. The middle jar on the otherhand is still a whitish emulsion and has a good amount of floating garbage.

The filtering is definitely working, almost to the point where I question if I should even water wash! My next step will be warming the jars up and letting them settle hot to see how that effects them.

Tuesday, March 28, 2006

Water Washing


Water washing
Originally uploaded by orthotomeo.
There is a theory that states that if you add water to vegetable oil you can remove particulates (suspended gunk) and make it cleaner.

Or so is the theory. I figured I'd try it with my new batch of oil. Originally both jars ofoil had as much oil as in the 1st jar and both looked the same. Both jars of oil were unfiltered (I'll try the results of filtering them first later). I added water to the 2nd jar and shook it up. This should cause the water to become attached to the bits and drag them down to the bottom. This should make the oil cleaner. Right now it looks like moldy tomato soup.

In reality you have two methods of "washing" the oil properly. The first is to add a set amount of water and then insert a bubbler and air stone in the bottom. This carries the water to the top coating the bubbles and in effect grabs all of the bits and when the bubble pop the water drops down to the bottom. This takes less water, but a longer time to work. It's called Bubble washing.

The second method is mist washing. That process takes a very fine misting sprinkler head (those little tiny ones) and sprays the water down onto the oil. It then carries the bits down with the water to the bottom and out of suspension in the oil. This takes a lot shorter time, but it takes more water.

Either method you have to syphon off the water from the bottom (or have a valve to open and pour out of) when you're done. Then you heat it as before mentioned and get any leftover water out of the oil.

Washing is a longer process. Some don't do the washing bit and just filter, heat and settle. What I do depends on how my tests conclude. I figure I'll try one mroe test with washing filtered oil and present the results.

Friday, March 24, 2006

The Wanderer


80_300D
Originally uploaded by orthotomeo.
Well Here she is... or is that a he? You see most people say cars should be ladies, but it's German. Why does that matter? Well Countries are also meant to be ladies, but Germany is called the Fatherland. Anyway...

There's Vegetapaul (for lack of a better name). I've hidden the rusty-er fender from the camera.

Found some shifting issues I'm still ironing out. We'll have to see what we can do!

I setup my filtration system. I start with a 45 gallon plastic barrel (don't worry it's fine to heat). I take my filters (a sewed up old leg from a pair of jeans) and then insert a circle in the top so it keeps its form. This then goes in one of the hoels in the barrel. Following that I take my 20 liter jerry can with the bendable nozzle and dump it in the filter. Because I keep the hair valve shut on the jerry can it acts like a gerbil waterer. You know, those things where the water only flows out of the bottle when the level gets below the nozzle?

Anyway, the garage is open to the outside and so its flowing very slowly! It's taking its time, but I started it a day or two ago and we're almost through 20 liters. I think that as the weather gets warmer it'll get easier.

At the bottom of the barrel I have a heating element in a ceramic container. It was originally an electric bbq I picked up for 50 cents at a garage sale and it turns out it'll work for what I want! When I have enough oil I heat it up till it's warm and then let it sit. It'll allow the water and debris to settle better so it doesn't get in my engine (water in the engine is bad!). So there we are.

Thursday, March 23, 2006

WVO filter warmer


Goldenrod_heated
Originally uploaded by orthotomeo.
Still waiting for the parts I tinkered a bit and started filtering oil. The oil filtering will be the subject of another day, so today I'll describe this funny looking object here.

It is a GoldenRod Diesel Fuel filter. It's standard farm equipment and can be purchased at Princess Auto for about $30. Like your normal car fuel filters this one prevents grit etc from getting into your engine.

The hose you see wrapped around the filter housing is coolant line. It keeps the oil warm while it is filtering before it gets to the engine. I'm planning on going through and insulating the outside of it to keep it as warm as possible, but for now it does the job!

So the total bills so far for the system has been allocated as follows:
Car setup: $450 (not including the need for a new valve).
Filtration: $70
Total: $530.
Other kits you normally see are around $1000 for basic and as much as $2500 for more complex! Crazy!

I know I'd do things differently if I did this again, but you're always learning!

Wednesday, March 22, 2006

Puttering along


Heat_exchange
Originally uploaded by orthotomeo.
Well I'm still waiting for my 2 ebay purchases to arrive so I thoguht I'd update on my under the hood wvo warmer.

I took 3 feet of 1/2" copper pipe and stuck it inside 2 feet of 1" copper pipe. At the ends of the 1" pipe I put Tees and the a reducer 1" to 1/2" ID (inner diameter). I soldered it all up and added connectors to the other tees for a barbed fitting and voila a copper hose in hose heat exchanger.

Heat Exchanger Connection
Originally uploaded by orthotomeo.
The fuel goes straight through the 1/2" Diameter pipe and the coolant goest through the 1" diameter pipe. Thus the fuel gets warmed by the 180+ degree coolant. I then wrapped the unit in pipe insulation.
This sits in under the hood, across the front of the car. It fits quite nicely.

Tuesday, March 21, 2006

Tanks a lot


copper_exchange
Originally uploaded by orthotomeo.
While I'm waiting for my fuel selector valve to be delivered I thought I'd go back and add some pictures.

The tank I'm using is a standard Marine fuel tank. $30 at Canadian Tire. I cut a hole in the back corner (as can be seen in the bottom left)to insert the heat exchanger.

Inserting the Exchanger
Originally uploaded by orthotomeo.


The Heat exchanger was made with soft copper with hard copper 90 degree turns. I got quite familiar with pipe soldering as a result of the experience. In the future I'd probably just use hard copper for price and ease.


Anyway, the design I chose was to allow it to be inserted into the tank while allowing the smallest hole and the biggest coverage of heating.

Done
Originally uploaded by orthotomeo.
This copper pipe carries coolant through the tank which radiates heat and warms up the tank, making the oil thinner.


P.S. I removed the fuse to my climate control blower motor and that seems to have solved my dead battery. Not a fix, but a temporary solution.

Monday, March 20, 2006

No auction success

Beaten. Oh well, I found another one I can pickup online at ebay. Actually several.

Barrel pump for pumping VOI picked up my Barrel for WVO filtering. I just have to have time to set it all up. I don't have a lot of time for that right now, but if I get my more important things done I'll move on to that.

I have to do an oil (regular) change on the car soon too, but I'm getting a dead battery from my blower motor for my climate control. Oy vey!

Thursday, March 16, 2006

Faulty Pollak

So This morning (seems the best time for me to do work on my car) I bypassed the diesel send side of the fuel selector valve (see previous posts). I took it right to the IP from the diesel send line from the tank. Doing this required me to undo the send line going into the fuel selector switch. So when I went to prime the fuel (using the built in hand pump) I was totally suprised to see fuel spitting out of the plug I had just disconnected! What's the deal! It looks like it's a faulty pollak. Probably because it say for a long time in a box drying out the seals it failed on me and began sucking fuel through the other channel. So I've found one on eBay that closes today! Hurrah! It'll be costly, but cheaper than other options and should solve everything...well most things!

Now I just have to figure out what's happening with my VO source.

Wednesday, March 15, 2006

Troubleshooting plans

1) disconnect the fuel cap
requires: just that
purpose: checks if negative pressure is building up for some reason

2) Reverse the Fuel send and return
requires: loosening connectors and switching the hoses to the opposite fuel lines.
purpose: checks if the screen on the fuel send is getting clogged.

3) Bypass the Fuel Selector
requires: 1 pcs from rona to adapt the two fuel hoses.
purpose: Checks if the Fuel selector is the problem

4) Replace the Fuel lines with clear braided hose
requires: Removal and replumbing of all my fuel lines (much work).
purpose: allows me to see where the bubbles are entering the line and isolate the problem.

Well that helped me organize what I plan today tonight or tomorrow morning.

...more stalling

So I tightened and re fastened the connections to the fuel selector switch. I changed the fuel filter too. It looks like It's getting worse. I'm going to grab a 3/8th connector and bipass the fuel selector in hopes that that solves my air problem. If it does I'll consider paying more money for better valves (www.frybrid.com has some designe for wvo).

So essentially I got down the road and stalled it when heavy on the throttle. After about 10 tries at starting and then using the handpump to get rid of the air I managed to get it home (stalling a couple times). Flustered and with my hands stinking of diesel I jumped in the Camry, noting I'm now going to be 20 minutes late for work, and took off. To add insult to injury I left my lunch in the mercedes. Thumbsdown.

The days (alright day) I used to run VO in my car seem but a dream. Looks like I'm going to have to poor more money into this little project.

Tuesday, March 14, 2006

Step 1 of the conversion

Conversion 101.
I recommend doing the conversion in steps. This means less down time for the vehicle and better troubleshooting in the long run.

First of all you will need a plan for your conversion. There are a lot available and I chose a custom hybrid that I felt would suit me.

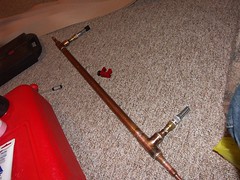
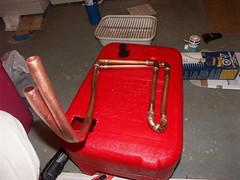
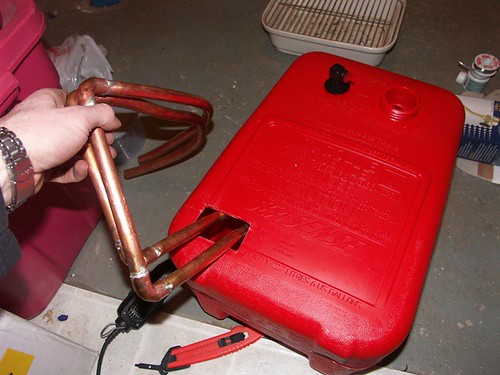
First of all plumb your fuel lines.
In a mercedes you can use the existing Injector pump to run your vegetable oil. Them old mercedes were built to last and their IP is no exception. As a brief overview your standard mercedes has 2 fuel lines going from engine to the tank (or from the tank to the engine depending on how you look at it. Well actually it's probably more clear to say one goes from the tank to the engine and the other comes from the engine to the tank). These fuel lines are the send and return. The return is because any extra fuel not burnt has to have somewhere to go (as well as any air that was stuck in the system). So a text diagram of the stock MB 300D setup
Tank -------Send----->Pre-filter--->IP--->Diesel Filter---->Injectors
Injectors---Return--->Dsl Filter--->Tank

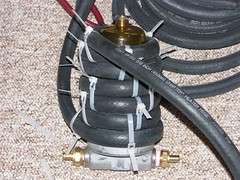
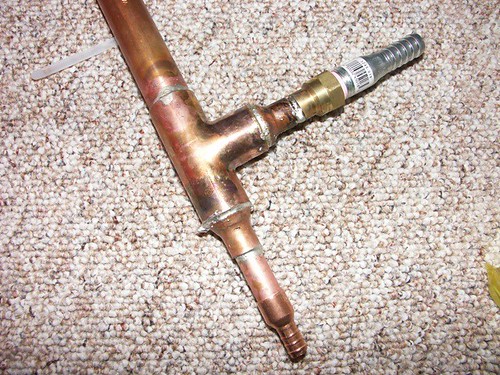
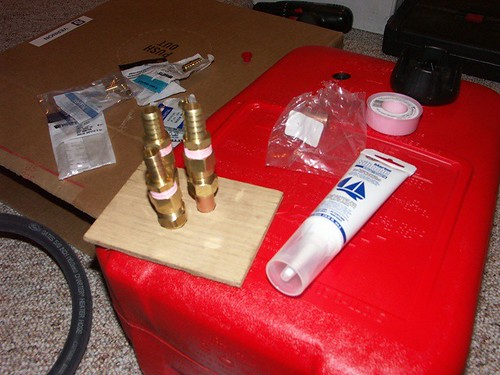
As you want to run 2 spearate tanks (1 for Diesel and 1 for VO) you'll need to plumb a standard switch to change the fuel source. I chose a 6-port as it was $15 used at a wrecker (I may regret the source though). Anyway, Here's a picture:


The idea is straight forward 2 separate send sources require 2 separate ports, 2 separate return lines require 2 more separate ports. Then of course we need 2 more ports to go to and from the engine. Voila 6-port valve. Flicking a switch will change which to send and return ports are being used.


Ok, but because we need to setup a filter for the VO and because we want to use the same Injector pump (IP) we need to replumb. Another diagram:
Diesel side:
Tank-->Send--->Pre-filter-->Dsl Filter->Fuel-Switch->IP->Injectors.
OK so far?
The Fuel-switch has a default setting so we can just connect it without worrying about power right now. So now we purge air out of the system using the handy built in plunger on the IP and we're ready to startup.
if all goes well we're ready to drive, but still on diesel.

Monday, March 13, 2006

Air in the fuel lines

well it looks like I have air in the fuel lines, which means I have air leaks (this isn't directly vegoil related, just plumbing related. Ah well I'll figure it out.

So just a FYI on some more Vegetable oil details.

The goal is to heat the oil to about 180 degrees F (82 degrees C) so it's liquid enough to spray out of the fuel injectors and therefore get a proper burn in the engine. One of the best methods for getting the oil warm is using the coolant lines (which run at about 180 degrees F) and routing them through a spare tank. I'll post pictures at some point.

As far as your vegetable oil, you just need to install a standard fuel switch like those used in 2 tank pickups and then re-plumb your existing fuel lines. Make sure you get the right size Fuel hoses. I ended up getting 3/8" and mercedes uses closer to 5/16 or whatever the metric equivalent is. So now I have to resolve.

Anyway I'll have to post pictures when I get my car running more smoothly.

Another update I dropped off 2 20l Jerry cans at the restaurant and hope to get the oil from them this afternoon. I'll pick up the containers and drop the oil in my cubees (or take them home and bring them back the next day). At least I'll be able to start the whole filtration process soon!

Friday, March 10, 2006

Secured a source

So I found a source for my WVO. It's a nice little Oriental restaurant in town. I had to chuckle to myself when I gunned the motor at work after lunch. I got out of the car and the parking lot smelled like french fries. Yumsk. I later went down stairs and couldn't help grinning as some of the scent had permeated inside.

Name that car:

We can't decide on a name for the 300D. We contemplated Betsy, but we're not sure it sticks. We considered Klaus because of its German Heritage, but decided against it.

More pictures and details to come.

Stalling means all go

Well I wired the switch, warmed up the engine and then took it out for a spin. I wasn't sure if I was on vegetable oil, but then the spedometer dropped quickly (air in the vegetable oil line. Thumbsdown. It stalled. But thumbsup that we're on vegetable oil... and air.

I pulled over to the side and tried to start it. Nothing. No turning over, no nothing. Took out the key, repeated, nothing. Realized it was in gear (stupid, stupid paul). Took a couple tries to start (oil wasn't warm enough and I'm sure we had air in the lines) but then pulled away and ran it at high speeds to make sure the oil flowed through. Kind of anti-climactic, but here's to canola!

I'll re trace the steps as I go, but I don't want to spoil you all by saying everything at once. It's enough to say that we can run vegetable oil in our car (even If I'm paying for the vegetable oil right now).

Thursday, March 09, 2006

The origin of Vegetapaul

... thanks to my brother.

For some time I've pondered the idea of running a car on used vegetable oil. This blog will monitor my process of learning and configuring and running my car on the aforementioned substance.

You'll find a lot of information on the subject scattered throughout the web, but I recommend you do your careful research before slipping in. The idea originates with the creator of the diesel engine (and only the diesel engine). Rudolf Diesel designed the diesel engine and used as one of his test fuels peanut oil. Long story short, there is a process that allows you to run your diesel engine with some tweaking on any type of vegetable oil.

There are several benefits to using WVO (Waste Vegetable Oil) or SVO (Straight... you get the idea). It is a lot better for the environment to burn VO (I won't go through this again) than Diesel or gasoline. Besides that it's cheaper. How much? Well restaurants have to pay to have their WVO removed... unless of course someone takes it off their hands for free. (Enter joe public with his overalls). So we've got a source of oil (well theoretically, I just have to arrange with a local Oriental food place!), but now we need a car (I have this).

The Car in question is a 1980 Mercedes 300D. There are a number of choices for conversion. 1979-85 diesels are great beasts as far as engine life and quality. You must be a tinkerer to work out the ups and downs cheaply, but the car is a workhorse (although slow as a mule). So after getting a screaming deal on the car and solving its problems, (and finding more that I didn't know about when I bought it) we were ready to convert.

To run a car on VO certain preparations and adjustments need to be done to your car to make it run smoothly on our new fuel. As you've noticed when you add a little olive oil to your frying pan, VO is noticeably thicker than say gasoline or diesel. That is until its been in the frying pan for some amount of time. Heat then is the key (yes you can do biodiesel, but for me, with a little Vegetapaul junior running around soon I don't want those chemicals readily available). So how do you get your oil to that temperature? Stay tuned.